瘋狂 Android 講義, 4/e – UI新增對應事件程式碼(新增按鈕程式碼) P43~P45
瘋狂 Android 講義, 4/e – UI新增對應事件程式碼(新增按鈕程式碼) P43~P45
資料來源:
https://github.com/daichangya/book/tree/master/android
https://pan.baidu.com/s/1d_xYJI0UQ_1tQzSj_V_NIg 提取码:70ch
https://www.ruyut.com/2018/12/android-studio-button-onclick.html
讀書筆記:
01.UI新增對應事件
▲在右邊的OnClick裡面輸入你想要的名稱”butt01_onClick”
▲切換到Text模式,他會多出一行android:onClick=”butt01_onClick”
02.UI事件與程式碼程式連結方法
▲游標選到你設定的名字那裡按Alt+Enter(同時按)選擇 Create ‘butt01_onClick(View)’ in ‘MainActivity’
▲滑鼠點選android:onClick=”butt01_onClick”那一行最前面的「紅色驚嘆號」選擇 Create ‘butt01_onClick(View)’ in ‘MainActivity’
03.開啟模擬器
Tools -> Device Manager -> 選擇想要的模擬器並且執行
04.執行程式
Run -> Run ‘app’
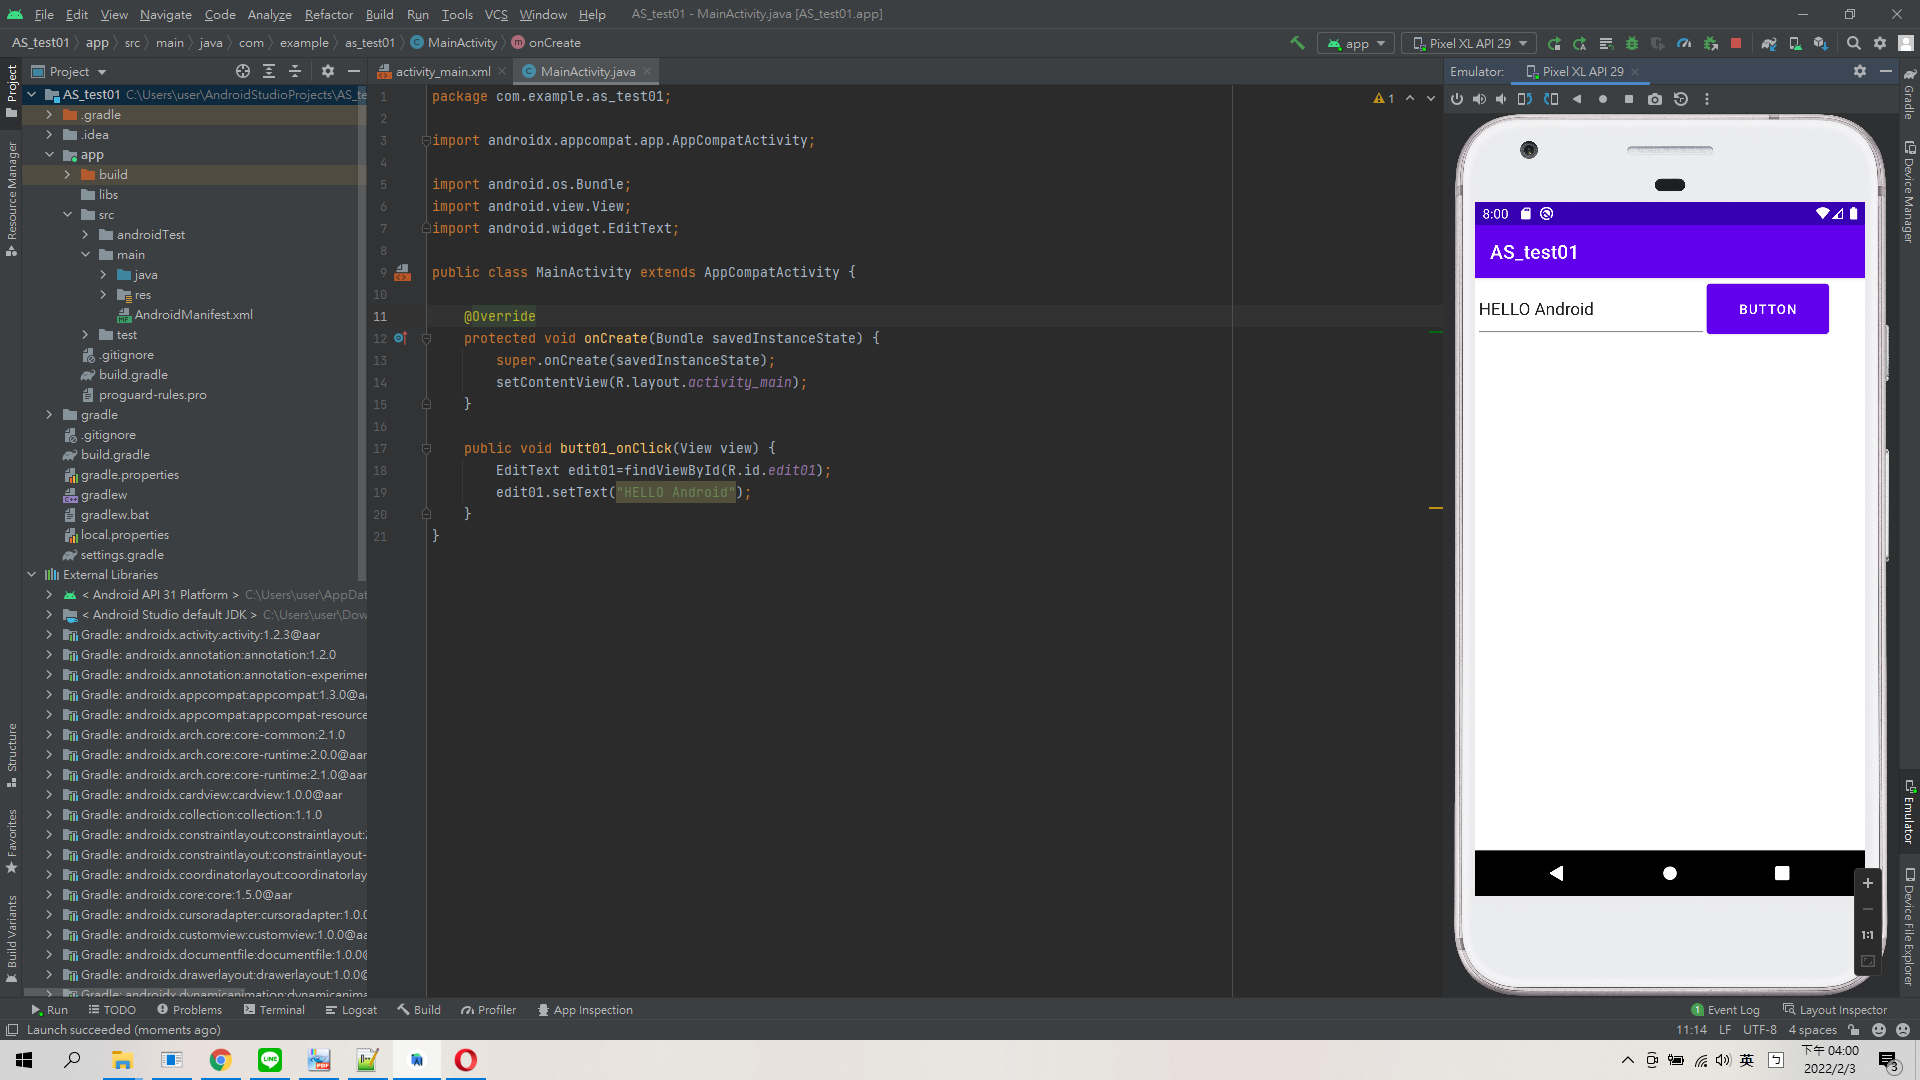
實作對應結果圖:
Android UI XML:
<?xml version="1.0" encoding="utf-8"?>
<androidx.constraintlayout.widget.ConstraintLayout xmlns:android="http://schemas.android.com/apk/res/android"
    xmlns:app="http://schemas.android.com/apk/res-auto"
    xmlns:tools="http://schemas.android.com/tools"
    android:layout_width="match_parent"
    android:layout_height="match_parent"
    tools:context=".MainActivity" >

    <LinearLayout
        android:id="@+id/LayLV01"
        android:layout_width="409dp"
        android:layout_height="729dp"
        android:orientation="vertical"
        tools:layout_editor_absoluteX="1dp"
        tools:layout_editor_absoluteY="1dp">

        <LinearLayout
            android:id="@+id/LayLH01"
            android:layout_width="match_parent"
            android:layout_height="65dp"
            android:orientation="horizontal">

            <EditText
                android:id="@+id/edit01"
                android:layout_width="wrap_content"
                android:layout_height="match_parent"
                android:layout_weight="1"
                android:ems="10"
                android:inputType="textPersonName"
                android:text="Name"
                tools:ignore="TouchTargetSizeCheck" />

            <Button
                android:id="@+id/butt01"
                android:layout_width="wrap_content"
                android:layout_height="match_parent"
                android:layout_weight="1"
                android:onClick="butt01_onClick"
                android:text="Button" />

            <Space
                android:layout_width="wrap_content"
                android:layout_height="wrap_content"
                android:layout_weight="1" />
        </LinearLayout>
    </LinearLayout>
</androidx.constraintlayout.widget.ConstraintLayout>
Android Code:
package com.example.as_test01;

import androidx.appcompat.app.AppCompatActivity;

import android.os.Bundle;
import android.view.View;
import android.widget.EditText;

public class MainActivity extends AppCompatActivity {

    @Override
    protected void onCreate(Bundle savedInstanceState) {
        super.onCreate(savedInstanceState);
        setContentView(R.layout.activity_main);
    }

    public void butt01_onClick(View view) {
        EditText edit01=findViewById(R.id.edit01);
        edit01.setText("HELLO Android");
    }
}
One thought on “瘋狂 Android 講義, 4/e – UI新增對應事件程式碼(新增按鈕程式碼) P43~P45”
Android Studio(AS)
Android 程式碼 取得/抓取UI元件 : findViewById
Android 程式碼 設定UI元件文字 : setText