jashliao 用 VC++ 實現 fanfuhan OpenCV 教學005 ~ opencv-005-像素(pixel)計算操作 [圖片合成(加/減/乘/除)]
jashliao 用 VC++ 實現 fanfuhan OpenCV 教學005 ~ opencv-005-像素(pixel)計算操作 [圖片合成(加/減/乘/除)]
資料來源: https://fanfuhan.github.io/
https://fanfuhan.github.io/2019/03/23/opencv-005/
GITHUB:https://github.com/jash-git/fanfuhan_ML_OpenCV
https://github.com/jash-git/jashliao-implements-FANFUHAN-OPENCV-with-VC
★前言:

★主題:
OPENCV提供等大且格式相同的兩張圖片進行四則運算的對應函數。
四則運算相關函數如下所列:
圖像相加: add(src1, src2, add_result);
圖像戴權種值相加(透明效果):addWeighted(src1, 0.5, src2, (1.0 – 0.5), 0.0, add_weight_result);
圖像相減: subtract(src1, src2, sub_result);
圖像相乘: multiply(src1, src2, mul_result);
圖像相除: divide(src1, src2, div_result);
★C++
// VC_FANFUHAN_OPENCV005.cpp : 定義主控台應用程式的進入點。
//
/*
// Debug | x32
通用屬性
| C/C++
|	| 一般
|		| 其他 Include 目錄 -> C:\opencv\build\include
|
| 連結器
| 	|一一般
|		|  其他程式庫目錄 -> C:\opencv\build\x64\vc15\lib
|
| 	|一輸入
|		| 其他相依性 -> opencv_world411d.lib;%(AdditionalDependencies)
// Releas | x64
組態屬性
| C/C++
|	| 一般
|		| 其他 Include 目錄 -> C:\opencv\build\include
|
| 連結器
| 	|一般
|		| 其他程式庫目錄 -> C:\opencv\build\x64\vc15\lib
|
| 	|一輸入
|		| 其他相依性 -> opencv_world411.lib;%(AdditionalDependencies)
*/
#include "stdafx.h"
#include <iostream>
#include <opencv2/opencv.hpp>
#include <opencv2/core/core.hpp>
#include <opencv2/highgui/highgui.hpp>

using namespace std;
using namespace cv;

void pause()
{
	printf("Press Enter key to continue...");
	fgetc(stdin);
}

int main()
{
	Mat src1 = imread("../../images/LinuxLogo.jpg");
	Mat src2 = imread("../../images/WindowsLogo.jpg");
	//Mat image = imread("../../../images/l_hires.jpg", IMREAD_GRAYSCALE);//執行檔 測試路徑

	if (src1.empty() || src2.empty()) {
		cout << "could not load image..." << endl;
		pause();
		return -1;
	}
	else
	{
		imshow("input1", src1);
		imshow("input2", src2);

		// 加法
		Mat add_result = Mat::zeros(src1.size(), src1.type());
		add(src1, src2, add_result);
		imshow("add_result", add_result);

		// 带权重的加法,一般推荐使用这个 浮水印 透明感
		Mat add_weight_result = Mat::zeros(src1.size(), src1.type());
		addWeighted(src1, 0.5, src2, (1.0 - 0.5), 0.0, add_weight_result);
		imshow("add_weight_result", add_weight_result);

		// 减法
		Mat sub_result = Mat::zeros(src1.size(), src1.type());
		subtract(src1, src2, sub_result);
		imshow("sub_result", sub_result);

		// 乘法
		Mat mul_result = Mat::zeros(src1.size(), src1.type());
		multiply(src1, src2, mul_result);
		imshow("mul_result", mul_result);

		// 除法
		Mat div_result = Mat::zeros(src1.size(), src1.type());
		divide(src1, src2, div_result);
		imshow("div_result", div_result);

		// 自己实现加法操作
		int b1 = 0, g1 = 0, r1 = 0;
		int b2 = 0, g2 = 0, r2 = 0;

		Mat my_add_result = Mat::zeros(src1.size(), src1.type());
		for (int row = 0; row < src1.rows; ++row) {
			for (int col = 0; col < src1.cols; ++col) {
				b1 = src1.at<Vec3b>(row, col)[0];
				g1 = src1.at<Vec3b>(row, col)[1];
				r1 = src1.at<Vec3b>(row, col)[2];

				b2 = src2.at<Vec3b>(row, col)[0];
				g2 = src2.at<Vec3b>(row, col)[1];
				r2 = src2.at<Vec3b>(row, col)[2];

				// b1:0~255,b2:0~255, b1+b2可能大于255,所以需要转换,通过saturate_cast<uchar>()
				my_add_result.at<Vec3b>(row, col)[0] = saturate_cast<uchar>(b1 + b2);
				my_add_result.at<Vec3b>(row, col)[1] = saturate_cast<uchar>(g1 + g2);
				my_add_result.at<Vec3b>(row, col)[2] = saturate_cast<uchar>(r1 + r2);
			}
		}

		imshow("my_add_result", my_add_result);

		imwrite("add_result.jpg", add_result);
		imwrite("add_weight_result.jpg", add_weight_result);
		imwrite("sub_result.jpg", sub_result);
		imwrite("div_result.jpg", div_result);

		waitKey(0);
	}

	return 0;
}
★Python
import cv2 as cv
import numpy as np

src1 = cv.imread("../images/opencv_images/LinuxLogo.jpg");
src2 = cv.imread("../images/opencv_images/WindowsLogo.jpg");
cv.imshow("input1", src1)
cv.imshow("input2", src2)
h, w, ch = src1.shape
print("h , w, ch", h, w, ch)

add_result = np.zeros(src1.shape, src1.dtype);
cv.add(src1, src2, add_result);
cv.imshow("add_result", add_result);

sub_result = np.zeros(src1.shape, src1.dtype);
cv.subtract(src1, src2, sub_result);
cv.imshow("sub_result", sub_result);

mul_result = np.zeros(src1.shape, src1.dtype);
cv.multiply(src1, src2, mul_result);
cv.imshow("mul_result", mul_result);

div_result = np.zeros(src1.shape, src1.dtype);
cv.divide(src1, src2, div_result);
cv.imshow("div_result", div_result);

cv.waitKey(0)
cv.destroyAllWindows()
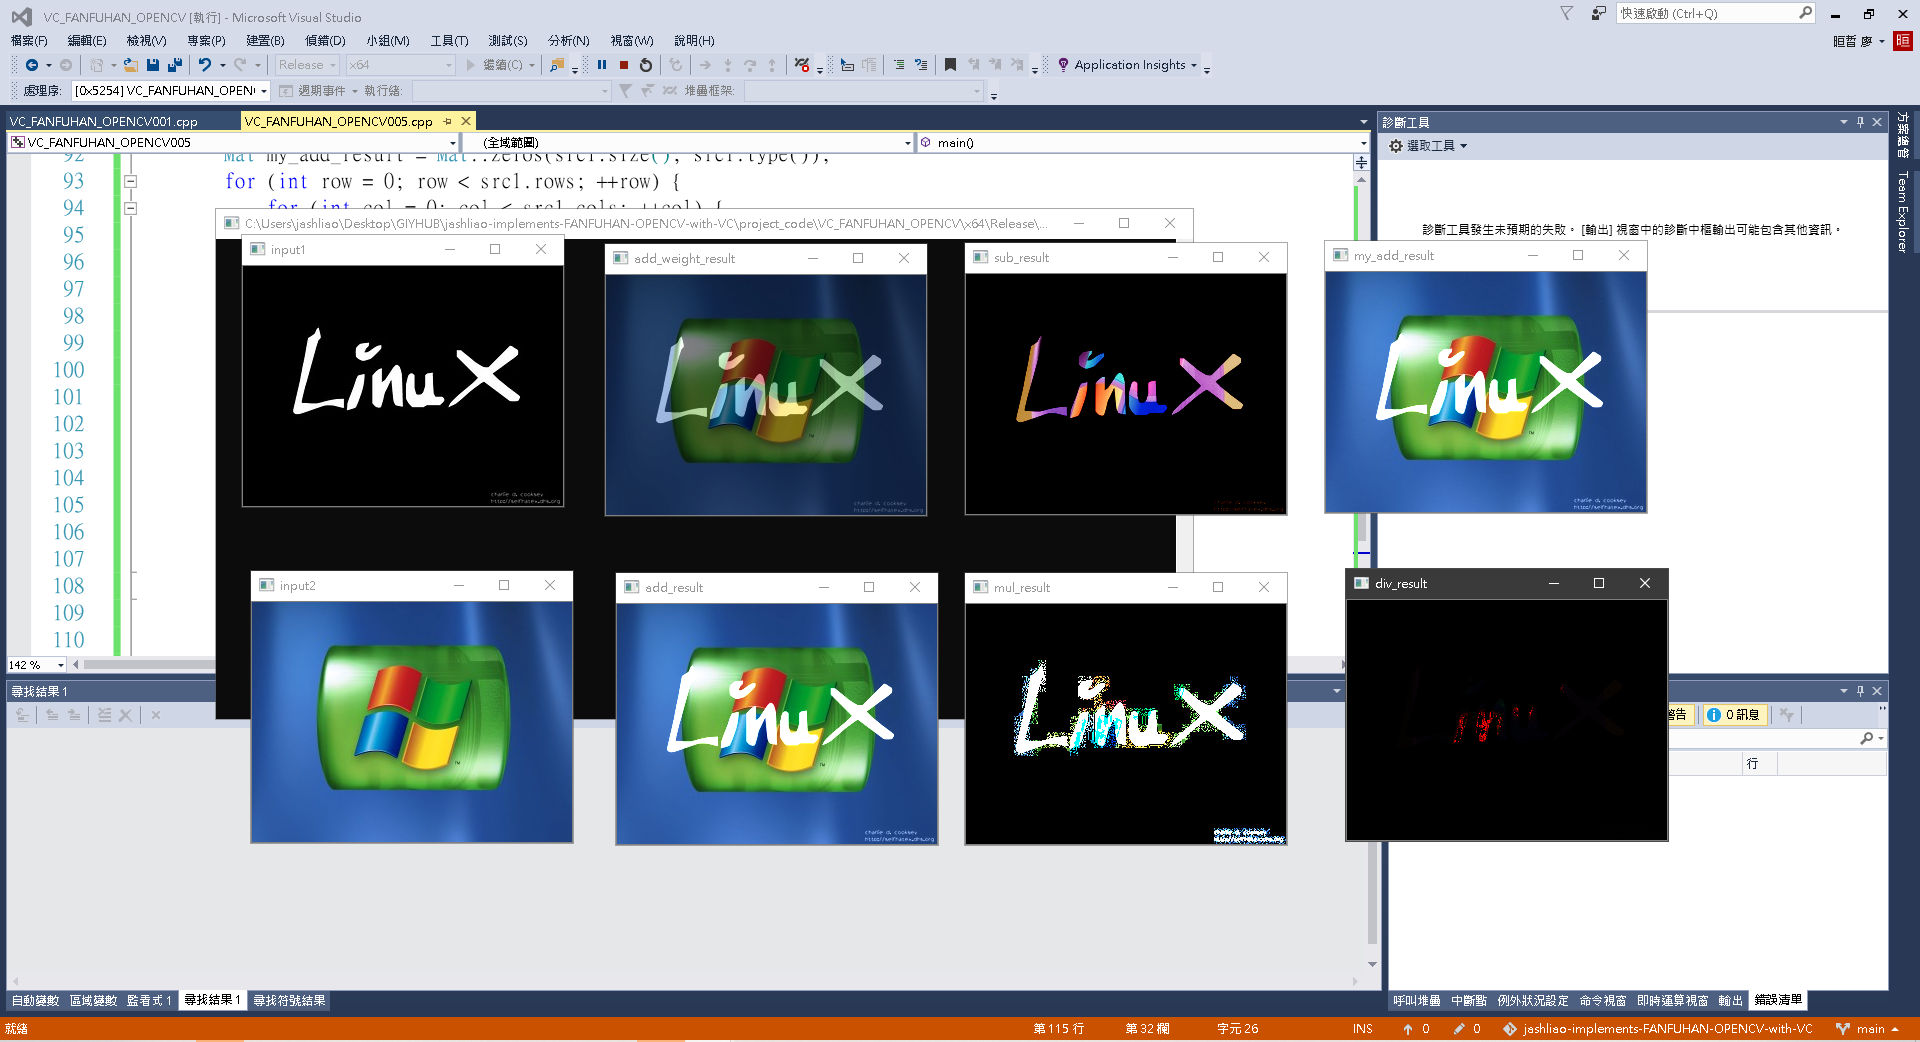
★結果圖:
★延伸說明/重點回顧:
想要使用OPENCV提供的四則運算函數前提條件必須是在兩張被運算圖像的類型類型、通道數據、大小都必須相同情況下。
由於上述的使用條件,當我們要自己撰寫類似功能時,記得使用saturate_cast <T> (value) 進行類型轉換,確保運算結果介於0~255,藉此預防運算錯誤。
PS.影像(圖像)處理中: 黑色(0,0,0) 白色(255,255,255)